Showing posts with label instructions. Show all posts

Friday, February 22, 2013

My Geocaching Kit

As I've mentioned before, I've never been an outdoorsy type.  Until I started caching the closest I got to camping... well, it was actually camping, but back when I was five years old.  Anything that took me outside was usually tied to some other nerdy interest, so I would gladly go out to launch model rockets or build a race track for my beloved RC car, but only because I loved my model rockets and car so much.

I started spending a lot more time outside once my son was born.  We live right across the street from a park, so that helps a bit, and as I've gotten older I've certainly developed a better appreciation of nature.

That being said, I have absolutely no experience packing a backpack for a hike.  I'm sure there is a better method to this than what I have come up with, and I'm also sure that there are better bags and supplies than what I'm using.  However, almost everything I have here was stuff that I had lying around the house, so the expense was minimal.

My kit has also evolved over the months since I started caching, and I'm sure it will continue to do so in the future.  This is really just a snapshot of what I carry with me now.

Backpack
Cost: $0
Value: Useful

...and I don't even remotely like Apple products.
I worked at Circuit City for many years and have accumulated a lot of vendor bribes.  Well, not really bribes as such; many vendors would give us presents as an incentive to sell more of their products.  So yeah, Ok, bribes. Anyway, I have a few backpacks that were given to me over the years, and this one has the most pockets and pouches.  I'm about as far from an Apple fan as can be, but hey, the free bag has been just fine for caching.

The backpack holds all of my stuff and has room for food and water if needed.


Garmin eTrex 20 and Accessories
Cost: ~$200
Value: Totally Worth It


Best birthday gift ever!
I actually got this as a birthday gift from my parents, so I'm listing the cost that you would spend if you
bought it from Amazon.  My wife got me the case, which is an absolute must.  I used to carry it in a ziploc sandwich bag before the case (to prevent scratches) but this makes things so much better.  There are quite a few case options out there, so pick out whatever suits your fancy.

The cable.
I also keep a spare cable for the GPS on hand, in case I'm at someone else's computer and need to load a GPX file or copy over a track or something.  I had quite a few of these cables lying around, so this was another freebie.

Spare batteries.
You also can't have enough spare batteries.  I'll probably eventually switch to rechargeable, but since we always have AAs on hand for Jack's toys I just replenish as I need them.  I keep these 4 together, and have a further 2 with the camera shown below.

Trinket Case
Cost: $1
Value: Needed it, but could probably find something better.

Not the best case, but it was only $1
I picked this up at a local dollar store.  Not really the best case, but it works and only cost a buck. I keep a few things in it:

Assorted trinkets and a Travel Bug.
I haven't spent more than maybe $7 or $8 on trinkets since I started caching.  I just try to trade for items of similar value.  I have many more that I didn't show - I just didn't feel like cleaning up a big pile of stuff.

Sandwich, snack, and pill size.
I also always try to keep some bags with me. I've generally used them to help waterproof contents of caches that have gotten damp, assuming that I can dry the damp items out a bit and not just make the situation worse.  The pill bags are great for log sheets in bison tubes etc...

Gloves
Cost: $10
Value: Priceless

I picked these up at Home Depot.
Gloves are probably the single most used item in my bag, aside from the GPS.  Many caches are in areas that range from simply grungy, to thorny, all the way to hazardous, and these were a great investment.

Sunscreen / First Aid Kit / Hand Sanitizer / Bug Spray
Cost: $20
Value: A Necessity

Sunscreen, in a plastic bag to avoid it getting everywhere.
I had the sunscreen on hand, which is why it's not travel sized. I was using it a lot in the summer when I was spending hours outside looking for caches.  I haven't needed it all that much recently, though I still carry it with me.

Mini first aid kit.  A small bottle of bug repellent is inside.
The first aid kit was very handy when Jack got a thorn wound.  I have not needed it since, but it's important to have one on hand, regardless.  Not shown: I keep a little spray bottle of bug repellent and a bottle of hand sanitizer in the first aid kit.  I used the bug spray quite a bit in the warmer months.

Camera and Accessories
Cost: Varies
Value: Don't bother with this is you have a decent camera on your phone.

Older model Canon camera with CHDK running.
I had this camera and its accouterments from my Kite Aerial Photography kit, so I didn't spend anything on it for caching.  When I bought this stuff several years ago it was about $100 for the camera.  The batteries are conveniently the same AA ones that my GPS uses, so I have a second set of spares just in case.

I like the Canon because I can run CHDK on it.  This software lets me hack the camera to do all sorts of stuff that it wouldn't normally be able to do, like time lapse (which is what I use for Kite Aerial stuff) or motion detection. If you have a lot of scenic cache areas and are into photography, you probably already have a better camera than this, so just bring whatever you feel is appropriate.

Of course, if you have a modern phone (I don't) you'll already have a better camera, so just use whatever you have.
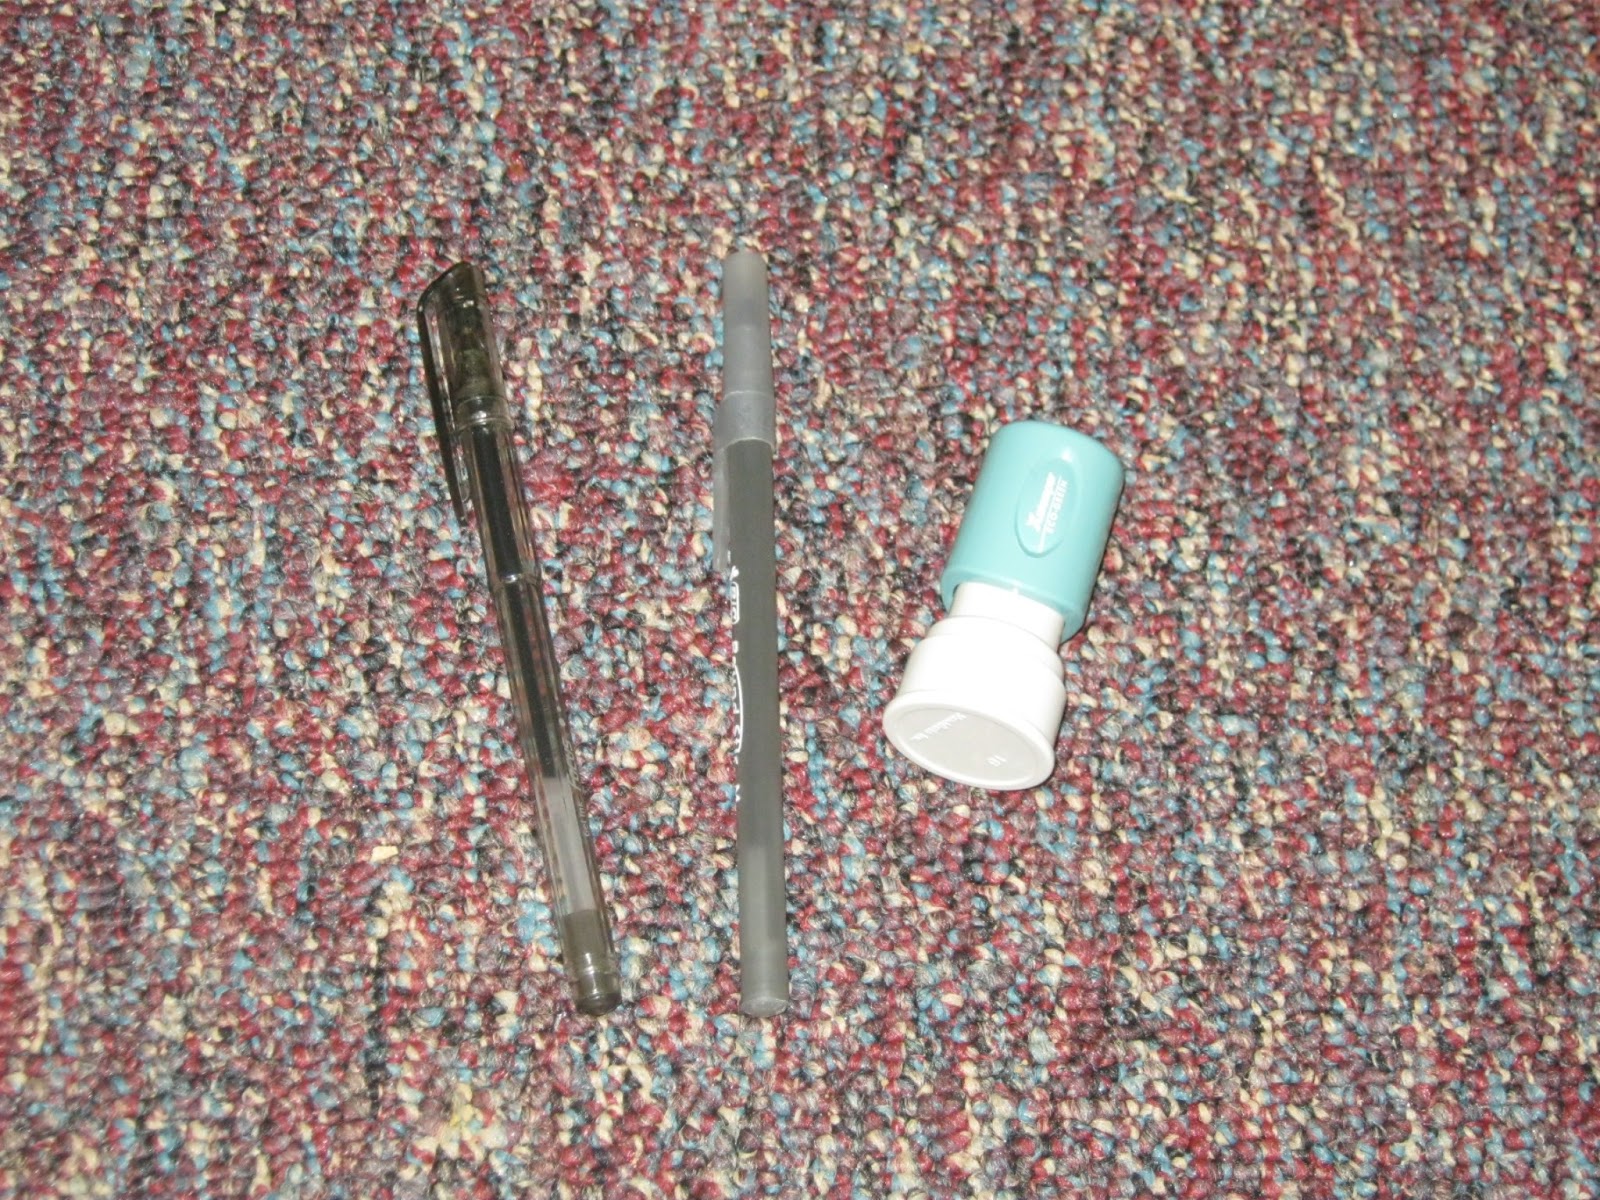
Notebooks and Pens
Cost:  Less than $5
Value: Very Handy

Cheap notebooks from Staples.

Two pens and a stamper (which was a gift).  I always have at least two more writing utensils on hand, just in case...
I always have plenty of pens or pencils handy.  Right now I'm using pens, because that's what I have on hand.  My folks got me the stamper a while back, so that's been great for signing logs when I'm trying to be quick and stealthy.

I keep the notebooks as spares for larger caches, and I can tear sheets out if I need to replace a missing log sheet.  I have enough notebooks on hand that I could replace a whole log book in a bigger cache if need be.

No clues for you!  I blurred this to prevent spoilers.
I also keep one notebook for any notes I need to take while out caching.  This is very handy for multi-caches, as the Garmin only keeps one additional stage no matter how many multi-caches I'm working on.  i.e. if I get the coordinates for stage two of  Cache 1 I can add those coordinates to that Geoache in my GPS.  But if I then add stage two of Cache 2 instead of finishing Cache 1, the ones I originally stored as stage 2 in Cache 1 disappear.

It sounds confusing, but the long and short of it is that I keep all of that info written down in this notebook anyway.

Supplies to Repair, Replace, and Create Caches
Cost: About $15
Value: Not sure I should keep carrying this stuff with me.

Magnetic keyholder, nano cache, bison tubes, and canister style cache containers.
Some of this stuff I had on hand, other stuff I picked up cheap.  If you don't mind the wait, there are often some freaky good deals on bison tubes at dealextreme.com  I've been carrying this stuff with me for a while mainly because I store all of my caching stuff in the backpack.  I have not needed to replace an actual cache container, so honestly, I could probably stop carrying this with me and only bring them out if I know I need to replace a cache and have the CO's permission.

A bunch of cheap carabiners.
I picked up a whole bag of cheap carabiners for $3 at MicroCenter.  I've used these when placing my own caches, but as above, have not needed them otherwise.

Plenty of zip ties.
I have used several zip ties to replace fallen caches.  I'll keep these with me even if I stop carrying the other stuff.

I took a solemn vow to try to make my cache containers interesting, but 95% of what I've found have used regular cache containers, as shown above.  At this point, I like knowing that I have the stuff on hand if I need it, but if weight ever becomes an issue with my backpack, this'll be what goes first.  Knowing that I have the ability to repair caches is not the same as actually needing that ability 24/7.

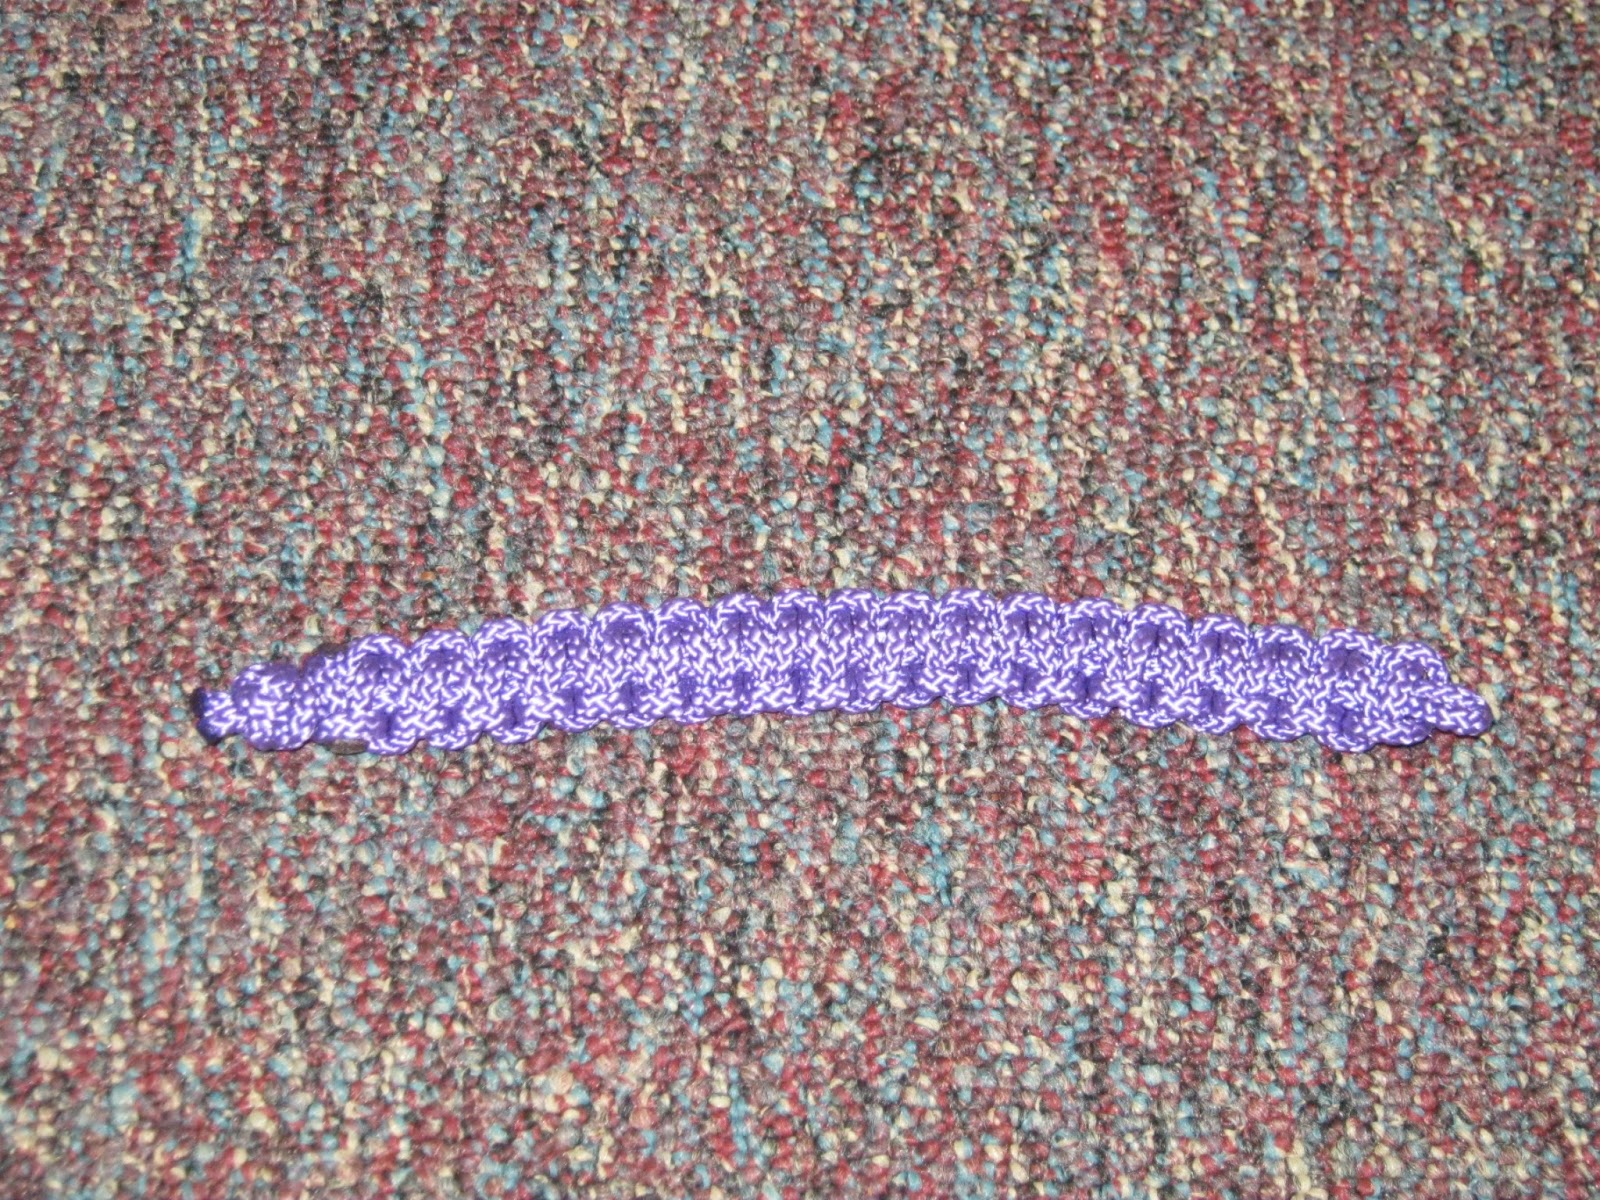
12 Feet of Nylon Cord
Cost: Cheap
Value - Possibly useless?

If there's a good use for this, I haven't found it.
I actually usually have a big spool of 250lb kite line in my kit, but I lent it out.  I've used it to hang fallen caches and generally attach things to other things.  Once I lent it out I decided that I wanted to have some sort of cord in my kit, so I scrounged up some nylon stuff I had lying around and decided to teach myself how to make a paracord bracelet without actually having real paracord on hand.  The good thing is that it was pretty easy; the bad thing is that I will never use this and I only keep it on hand so I don't feel like it was a totally wasted experiment.

CITO bags
Cost: Free
Value: Worthwhile


These happen to be from Staples.
Yes, I know I could pick up some real trash bags cheap, but I always have these bags on hand and I'd just as soon use them.

Tools
Cost: Cheap or Free (except for the Leatherman)
Value: Handy

Picked from several old computer toolkits.
In order, I have use the tweezers the most, followed by the little grabber dealy (they come with 90% of all computer toolkits).  I've used the magnet and the mirror once or twice apiece.  I work in IT and have accumulated tons of computer toolkits over the years, so I just scrounged for this stuff.  MicroCenter has lots of things like this in their cheap section, so if you can't scrounge for it you can expect to pay about $2-$5 for each tool.

The Swiss Army Knife was a bribe from Lexmark.
I never actually got a chance to use my knockoff Swiss Army Knife because I ended up getting the Leatherman Wave from my wife on my birthday.  I have used it quite a few times, though in hindsight I really think that I'm going out of my way to figure out ways to do things that require me to use it.  i.e. "Rather than cross the footbridge, I can make my own by using the saw tool to cut down several small trees, the knife to cut and sharpen wooden pegs, the file to smooth things out, and the pliers to put it all together!"

Flashlights
Cost: $6
Value: The flashlight was worth it.  The blinky thingy... not so much.


One useful, and one not so much.
I have used the flashlight a lot, as many cache hiding areas can be quite dark.  I have never used the glowy light stick thing, though - that was an impulse buy at Home Depot when I was there with Jack.  At the time I had all of these crazy ideas about using it for night caching, but since every park in a 30 mile radius from my house closes at dusk, night caching is really just pipe dream.

I think I really keep it in the kit to keep my wife from finding out that I bought it in the first place. I mean, it was only like $3 or something, but she doesn't really appreciate my need for glowy flashlight things like she should.

Final item
Not Shown - The Official Geocaching Brochure

If you don't have one or two of these printed out and on hand in your kit, get it here.  While I have never been actually hassled by anyone about my caching, I have been approached by people curious about what exactly I am doing.  Having the brochure on hand makes any explanation easy, and it has the fringe benefit of introducing new people to the hobby.  I usually keep a few of these in my kit, and one or two in my car in case I am caching without my kit that day.

Final Thoughts

Since I do the bulk of my caching during lunch breaks at work, and many of the hides in that area are LPCs, nanos, and the like, I don't actually bring my kit with me 75% of the time.  I usually just have my GPS and a pen on hand.

If I'm planning ahead and I know I'll be in a larger park I'll take the full kit, though I think in the near future I'll be looking at a smaller bag to have with me on my day to day short trips.  I'll keep this one for times when I'm caching for an entire day, or need to bring my lunch etc...  I'll cross that bridge when I get there, though, and considering that I haven't had to spend all that much money on caching (so far, at least), I'm pretty happy with what I've put together.

Friday, February 1, 2013

How to Take Screenshots on a Garmin eTrex 20 - and more!

Here's two quick Garmin eTrex 20 tips - how to take screenshots, and how to create a startup message.

The three current eTrex models are very similar, so this tutorial should also work on the eTrex 10 and eTrex 30.  I'm assuming that screenshots on the eTrex 10 will be black and white, as that model has a black and white screen.  If anyone happens to have an eTrex 10 and wants to try this out and leave a comment, that would be great.

How to take Screenshots

Setting your GPS up to take screenshots is a snap.  In the menu, click on Setup.


Next, click on Display.


Select Screen Capture and change the setting from Off to On.


This dialog window will pop up, explaining what to do:


Any time you see something on your screen that you wish to capture, press the Power / Light button.  Instead of popping up with the brightness settings, a screenshot is taken, and the file is left scrn subfolder of the Garmin folder.  Connect your GPS to your computer, navigate to that folder (shown below), and you're all set.
Click to Enlarge.
The files are in BMP format and can be used in pretty much any image editing, word processing, or desktop publishing software.

 While we're looking in the Garmin folder, open up the startup.txt file.

Click to Enlarge.
This file is where you can create a custom startup message that is displayed when you first turn your GPS on.  In my case, I have a message that just says that the GPS is mine, and to call me at my number if you happen to find it.

Click to Enlarge.

See the section where you can make the message stay online for X number of seconds?  If you have any custom maps (which I'm covering in another tutorial), your GPS is probably already staying on that screen for at least 10 -15 seconds anyway, so there really isn't any need to make that number anything other than zero.

Sunday, January 20, 2013

Pocket Query Basics

One of the features of Premium Membership is the ability to create Pocket Queries. A Pocket Query gives you the ability to create a custom search that can either be viewed on the map or downloaded as a GPX file, which can be copied to your GPS receiver.

When I first started messing with Pocket Queries I wasn't quite sure what to think.  You can only run five queries per day, and each query is limited to a maximum of 1000 caches.  1000 caches seems like a lot, but seeing as my home state (Pennsylvania) currently has over 30,000 caches, it's just a drop in the bucket.  The ability to download the Pocket Queries as GPX files is handy, but when compared to a tool like GSAK (which itself is limited by the Geocaching API), again, it seems limited in scope.

However, with a little bit of tinkering and some patience, Pocket Queries can be one of the most powerful tools on the Geocaching website.  Some examples of what you can do:
  • Create a daily query for new caches, giving you a map of FTF possibilities.  When combined with the Instant Notification premium feature, your chance of being first to find is greatly increased.

  • Create a query for caches that contain trackable items, like Travel Bugs and Geocoins.  In this case, the 1000 cache query limit can still end up giving you a wide range.  In my case, if I run this query centered on my home zip code, I end up with a circle of caches almost 100 miles in diameter.

  • You can create queries in overlapping circles, and then combine them in GSAK (works for everyone) or BaseCamp (if you have a Garmin GPS receiver).  This allows you to create a single GPX file every cache over a fairly large distance.  Compared to downloading caches via the Geocaching API in GSAK, Pocket Queries are faster by several orders of magnitude.  This topic is worthy of its own tutorial, and I'll be creating one soon.
In this tutorial, I'll be covering the basics of Pocket Queries.  I'll post more tutorials with more advanced topics at a later date.

Pocket Query Basics

A pocket query is simply a way to search for caches that meet specific criteria.  If you are browsing for caches with the Hide and Seek a Cache section of the Geocaching web site, you are limited to a pretty basic search based on location.  Pocket queries let you refine your search to look for caches in many other ways, e.g. all Puzzle Caches within 50 miles, or caches in Large containers with a difficulty greater than 3 within 10 miles of Philadelphia, or members only caches that have been not been found yet.

There are some limitations to keep in mind.  You are limited to 1000 results in a Pocket Query search, and you are limited to 5 Pocket Query searches per day.  As long as you understand these limitations, it's fairly easy to work around them.

The example used for this section is a simple search within a 15 mile radius of particular location - in this case, Mullica Hill, NJ.  This is one of the queries that I combine into my main weekly GPX file for my Garmin eTrex 20.

To follow along, bring up the Pocket Query section of the Geocaching web site.  NOTE - You must be a premium member to use this feature!

The first section of the page allows you to name your query and choose how often you want the query to run.  
  • If this is a one time thing, e.g. a list of caches near a vacation destination that you won't be visiting again in the near future, you can select Run this query once then delete it.  
  • If this is a query that you want to save for later, but it doesn't need to run on a recurring basis, click Uncheck the day of the week after the query runs.  If you want to run the query once, now, make sure that the current day of the week is checked.
This section also allows you to limit your results.  I always set this to the maximum, which is 1000.  I may someday have a need to search for fewer caches at the time, but today is not that day.

Click to enlarge.
The trick to effectively scheduling queries is to spread them out over several days and repeat ad infinitum.  In order to run my queries for my main GPX file, I run four basic queries centered on overlapping locations on Mondays, Wednesdays, and Fridays.  That way, I can generate my GPX file any day of the week and have my date be off by four days at most.

The second section allows you to select which types of cache you are looking for.  In my case, I limit my results to Traditional, Multi, and Virtual caches.
Click to enlarge.
I am working on several Unknown puzzle type caches at the moment, but every one I have looked at shows a lot of information on the cache description page; much more that what would carry over in a GPX file.  If I want to create a separate Pocket Query for use on the Geocaching map of just Unknown caches sometime in the future, I can do that here.

The next section is self explanatory - container size.  I leave this as any container.

Click to enlarge.
The next section is actually the most challenging section of the bunch, as one check mark in the wrong spot can give you zero result queries.

Note the That (And) at the top of this section.  The "and" means that your cache results need to meet all of the checked requirements.  If you want to look for both Enabled and Disabled caches (if you are updating GSAK data, for example) and check both boxes, you will end up with zero results, as it's impossible for a cache to be both Enabled and Disabled at the same time.

Click to enlarge.
Likewise, if you want to find caches that you've already found, as well as caches that you haven't, you'll get zero results if you check both boxes. The Difficulty and Terrain boxes work in the same way, though you will likely still get results even if both have been changed to higher numbers.

As I use GSAK to tweak my GPX data (more info in a later post), I actually want to see both disabled and enabled caches.  If you are not intending to do anything other than copy the Pocket Query's GPX file straight over to your GPS, you'll want to check the Is Enabled checkbox.

If you're first starting out with Pocket Queries, it's a good idea to either practice with these settings a few times to see what to do to avoid zero result queries, or get in the habit of only choosing one item to search for - Is Enabled being the obvious choice.

The next section allows you to search within a specified location.  This is not the same as searching along a route, which will be covered in a later tutorial.  This simply means that you can search for caches within a specified radius from a point you set - e.g. 15 miles from your home town, or within a mile of specific map coordinates.

In this case, I'm simply using the zip code of the town that's the center of my query - Mullica Hill, NJ.
Click to enlarge.
The most important thing to be aware of in this section is the 1000 result limit.  I live in a heavily populated area, within 15 miles of a major city.  If I search for all caches within 15 miles of my house, I get more than 1000 results.  This means that if there are 1300 caches in that range, the query will only show the first 1000 and the remaining 300 go poof.  That may not sound like a big deal, but knowing my luck I'd happen to be 14.7 miles from home with my GPS only to discover that there are none in the area because they poofed due to my poorly thought out query.  The goal is to get as close to 1000 results without going over.

The trick to resolving this is to see how may results you receive and adjusting the radius of your search accordingly.  To do this, go back up to the top of the page, select a day of the week a few days in the future, scroll all the way back to the bottom of the page and click the Submit Information button.

The page that pops up will have a message showing you the total number of caches in your Pocket Query.  Setting the day a few days in advance means that the query won't actually run today and use up one of your five daily queries.

Click to enlarge.

I've already tweaked my query, so I know that a 15 mile radius from Mullica Hill results in pretty close to 1000 results.  As of this posting, it's 962.  Pocket queries take a few minutes to run, so if you are hitting the limit, adjust the query and submit it again to see if you're back under 1000.

You can do a few things:

  • Make the search radius smaller.  Check 14 miles, then 13, etc... until you find a distance with less than 1000 in the result.
  • Check for fewer types of caches.  Search for only Traditional caches instead of Traditional, Multi, and Virtual.  A ballpark estimate would be that 90% of the caches in my area are Traditional, and that 10% difference may knock you down below 1000 results.
  • Likewise, limit your caches to ones of a certain size.  Hate micro and nano caches?  Now's your chance to stop seeing them in your results.  Simply check every type except Micro in the Selected Containers section of the query.  You may want to uncheck Unknown as well, as many nano hides are listed as Unknown.
  • Limit your caches only to ones that are Enabled.  This is great if you're copying the GPX files right from the pocket query into your GPS, though if you use a tool like GSAK (as I do) this won't work all that well.
  • Limit your query a bit by including or excluding caches with certain attributes (more details below).  Excluding caches near poisonous plants, ticks, or dangerous animals is probably a good idea anyway. 
Once you get things resolved, don't forget to go back up to the top of the page and change the day of the week back to whatever it was that you originally decided in the first place.

Almost done. The Placed During section allows you to look for only new caches, or all caches placed in May 2012, or caches from back in 2009 or whatever.  You get the idea.

Click to enlarge.
In this example I want everything, so I leave it set to None Selected.

The last major section allows you to select which cache attributes you want to include or exclude in your query.  From what I've seen, people are pretty spotty with using attributes, so unless you want to cut your results back a ton, leave this alone.  I mean, sure, you can exclude caches near poisonous plants, but based on the cache logs I've seen, this has been misidentified as a poisonous plant.

Click to enlarge.
The final section, Output To, allows you to select which email address to receive the GPX file - though the files are only actually attached if the queries are less than 500 results long.  You can change the file type from GPX to LOC, but only do this if your GPS is an older model and doesn't work with the GPX format.

Click the Submit Information button, confirm that the query gets results, and you're all set.

Now what?

Once your queries actually run, based on the schedule you set earlier in this tutorial, they will show up in your list of active Pocket Queries (my list is shown below).

Click to enlarge.
From this page, you can change the schedule or edit the settings for any of your current caches.   Note that in my case, I run my location searches (the first 4) on Mondays, Wednesdays, and Fridays.  See the distances?  Each of those was tested to ensure that it was under 1000 caches.  You can't tell from my query names, but I can get 15 miles from Mullica Hill (kind of rural), but only 15 kilometers (a little more than 9 miles) from Willow Grove (more developed).  There is no particular reason for my flip flopping between Metric and Imperial units - as long as I get to just under 1000 caches I don't care how it's measured.

Also note that I have queries set up for FTF possibilities and trackables.  Those will be detailed in another post.

If you click the Pocket Queries Ready for Download tab, you can click the link and download the ZIP files with your GPX files within.  Pocket Queries are available to download for a week, after which time they disappear.  As I have mine all set to run over and over every few days, none of them should ever be older than 4 days (3 days remaining).

Click to enlarge.
Simply copy those files to the appropriate folder in your GPS to load them.  Once loaded, they will be available as waypoints.  As each brand and model is a bit different I won't go into details here, but expect some information on the Garmin eTrex series here soon.

The last this in this tutorial is using Pocket Queries with the Geocaching map.  On the Geocaching site, click on Play - View Geocache Map to bring up the map.


On the upper left hand side of the map, you can switch from the regular Search window to the Pocket Queries view.

Simply click the query you wish to view, and your map icons will be limited to those caches within that particular query.  As each query should have approximately 1000 caches in it, you'll still see plenty of caches on your map.

This covers the basics of using Pocket Queries!  The information here went over basic queries, but with a little experimentation it's pretty easy setting up more advanced queries, like ones for FTF hunting or trackables.  Future posts will get into those topics in detail, as well as how to integrate Pocket Queries into GSAK.

If you have any further suggestions or comments for this post, feel free to leave them below.  Thanks for taking the time to read this, and happy cache hunting!

Tuesday, January 15, 2013

Using Google Maps to Find Geocaches

Part of my hesitation in originally trying Geocaching was my lack of a GPS.  I had a cheap TomTom in my car, but it was unsuitable for caching (believe me, I tried).  At best, it could get me to a nearby parking area; the worst it did was try to place me on a highway overpass, rather than the road underneath where the cache was hidden.

I've seen the Geocaching.com blog post about the guy who does everything with maps, but honestly, my map skills and patience for the technique are not that good.  I did manage to find my first 20 or so caches without GPS, though, simply using Google Maps.  This gave me enough of a taste for caching that I decided to commit to it and eventually invest in a GPS receiver (though I ended up getting one for my birthday instead - woohoo!)  It's a great way to learn about caching without spending a dime, and the challenges of using a map instead of a GPS add an additional element of "fun".

This is not difficult to do, but I'm posting a short tutorial with pictures for anyone interested.  I'm still pretty new at this, and I love hearing about people discovering this hobby.  If this helps get you out and caching, all the better!

Important - please note that this method works best in an area with landmarks.  It's pretty easy to identify light pole caches or guard rail caches with this method, and bushes and trees are pretty easy to spot if the area is not too overgrown.  I would not recommend doing this for caches in the woods, however.  This works well in urban or suburban areas: parking lots, shopping centers, and the like.

GPS Accuracy Issues

Also note that the coordinates listed on the Geocaching web site are only as accurate as the GPS used to get the coordinates in the first place!  The rule of thumb is that the coordinates get you within 30 feet / 9 meters, so even if you follow these steps exactly, you may only end up close to the cache.

Additionally, GPS accuracy is limited by both the original cache owner's coordinates and your own GPS accuracy.  If their coordinates were off by 30 feet when they submitted the cache, and you're 30 feet off from their original coordinates due to your GPS, you're now 60 feet away!   As you gain experience, you'll rely less on the GPS and more on what you've learned, and even if you have a state of the art GPS, it's still a good idea to scope out the satellite view first and look for landmarks in advance.

STEP 1 - Choose the cache

Visit Geocaching.com and look for a cache that you want to find.  For this example, we'll use an archived cache so I'm not giving any spoilers away - Avoid the Noid, which was archived back in September of 2012.  I'd also like to thank the owner, ngauger, for permission to use this cache as an example.

STEP 2 - Copy the coordinates

Highlight the GPS coordinates with your mouse and copy them.  I use Ctrl-C, but you can just as easily Right click and select Copy.

Avoid the Noid
Copy the coordinates from the circled area.

STEP 3 - Enter the coordinates in Google Maps

Visit the Google Maps web site, paste the coordinates into the search area, and hit Enter.

Google maps!

STEP 4 - Adjust the map to show the cache

You'll notice that Google Maps shows two markers - the red pushpin "A" marker, and a green arrow.  The coordinates that you entered are always the green arrow. The red pushpin shows the closest business nearby, so in this case we can see it's a Domino's Pizza (remember the old "Avoid the Noid" commercials from the '80s?).

If you are seeing the street map, rather than the satellite view, click the square in the upper right hand corner that says "Satellite". 


Zoom in as close as possible.  By default, Google Maps now tilts to a nifty 45 degree aerial shot when you zoom close, but that's not always going to be very helpful.  Move your mouse over to the top right button that now says Map and uncheck the 45° symbol.

Make sure that 45° is unchecked.

STEP 5 - Look for landmarks

The image below shows the cache area, zoomed in as far as it can go.  As mentioned above, the green arrow shows the location of the GPS coordinates that you entered into Google Maps.

Zoomed in, flat view.  The green arrow is the location of the cache.
Look for landmarks within the picture.  In this case, we can see at least three trees (maybe two large trees and a big bush) to the east side of the building.  We can also see that the cache is pretty close to the northeast corner of the building.

Some landmarks to look for:
  • Anything in a row, e.g. trees, light poles, telephone poles, etc...  If the cache is near one of them, simply count down the row until you get there - i.e. Second light pole in the third row of cars in a parking lot.
  • Landmarks within line of sight - Is there a water tower or cellular antenna tower nearby?  Are you within sight of one corner of a large building?  You can use the visible landmarks to triangulate your position.
    • You may be able to use the printed copy of this image (Step 6 below) to help triangulate position.  Use a ruler and pencil to draw lines intersecting the cache with the tall landmarks.
  • In parks, look for ground markings on sports fields.  Does the cache line up to the third base line? (I found one this way)  Also look for bleachers, goal posts, or anything else to help get your bearings.
  • Lone objects in otherwise empty areas.  I found a cache under a bench, which was the only thing visible on the Google Map.  Honestly, I couldn't tell it was a bench from the satellite photo, but when I got to ground zero it was easy to spot.
Here's another example from a different cache:


In this case, the green arrow isn't pointing at anything in particular, but it's really, really close to a light pole.  As mentioned above, GPS accuracy is an issue.  In this case, it makes sense to check the light pole before expanding your search area.

Another example from a different cache:


Note that the green arrow is pretty close to several trees off of a dirt road.  You can bet that the cache is in one of the trees, but you probably should actually go to GZ to get a better sense of where the hide may be.

And here's one that's probably too difficult to find without a GPS:

Yeah, good luck finding this one.

Note the lack of landmarks in this picture.  I mean, you can see the roads, but there are a lot of trees, and not much information in this image to differentiate between them.  You can barely tell from the image above, but there's also a stream in the vicinity.  When you switch to the Map view from the Satellite view, you see this:

I actually looked for this one with a GPS and still couldn't find it.  It's since been archived.
The location of the arrow looks like it may be on the west side of the stream, but with GPS accuracy it could really be on either side.  Note that there are still no other landmarks to work with, so unless you feel like putting on waders and working your way up and down both sides of the stream, it's probably a good idea to look for a different cache.

STEP 6 - Print the image and go find the cache!

You can print this image by clicking the little printer icon in the upper left of the window.  The little chain link thing lets you copy the web site permalink for email / posting / etc...

Print the cache description and hints as well, along with a few recent cache logs.  It's probably a good idea to review more logs to gather any more clues that you may need.

Now get out there and find the cache!

OPTIONAL STEP - Use Google Street View to get more information

You've done all that you really need to do, but the more information, the better.  Let's check to see if there is any Street View images that can help us.

Please note that the pin that shows up on Street View can be much less accurate than the pin viewed from overhead.  Also note that Street View is not available in many areas, places like large parking lots, and anywhere off road.

Using the original "Avoid the Noid" cache as an example again:

So we know that the cache is somewhere near the northeast corner of the building, but before you go to visit the cache you may want to check out the Street View of the area to get a better idea of what to expect. 

Click and drag the little Street View guy over to the nearest road.  As long as the road turns blue when you hover over it, Street View images are available.

Drag this guy over to the closest road.
Drag the mouse around until you see the pushpins, and zoom in if you need to.  You should end up seeing something like this:

The pushpin to the left, with the GPS coordinates, shows the location of the cache.
The pin to the left, marked with the GPS coordinates, is the location of the cache (or nearby).  It's difficult to see in this picture, but there is a guard rail right near that marker.  The hint for the cache was "Look by the tree", and sure enough, the cache was located just past the tree, in the guardrail.

Final Thoughts

Obviously a GPS receiver, or even a smartphone, makes things much easier, but if you don't have access to them it's still pretty easy to go caching.  So... what are you waiting for?  :)